Hull Design
Hull Design - General Notes
---------------------------------
Hull Composition:
The hull of our vessel has to accomplish multiple things in order to be successful.
- Don't sink
- Go fast
- Fit everything nicely
- Don't put us in debt
The first thing it has to do is not sink, as we are designing a surface vessel, not a submarine. The way a ship doesn't sink depends entirely on its hull's ability to resist taking on water during normal use. The way we have chosen to do this with our hull is by creating a composite hull, comprised of the following layers:
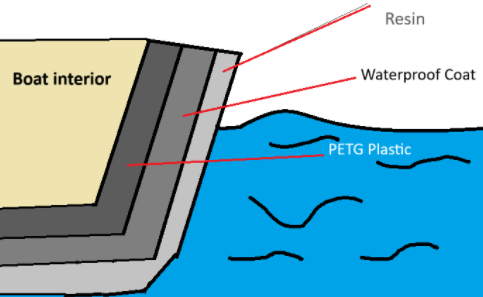
- The first (or inner) layer of PETG plastic will be 3D-printed, in panels, which provide the outer skin of the boat. PETG was chosen for its temperature resistance, general rigidity (which aids the "skeleton" in maintaining structural integrity), and water resistance after printing. It is a flexible middle-ground between PLA and TPU, having more flexibility than PLA (being less brittle) and being more rigid than TPU.
- The second (or middle) layer of the hull's skin is a roofing-grade waterproofing paste. Though plastic is not usually thought of as susceptible to water absorption, if water is absorbed into PETG plastic over time, the structural integrity of the plastic may be compromised. It may become more brittle and therefore less resistant to impacts from waves or the wakes of other boats, which is bad. So, this paste layer will prevent water from damaging the plastic underneath.
- (OPTIONAL) A second middle layer may be added if decals / art is to be added to the hull. Whatever paints / dyes are used will be sealed by the following layer, but must be placed on the outside of the opaque waterproofing layer so that it A) does not prevent the waterproofing layer from waterproofing, and B) is not obscured by the opaque paste.
- The last (outer) layer will be a translucent resin, which will act as a sealant. This final layer prevents the elements from interacting with the paints, waterproofing layer, and plastic. It will also make the boat shiny :D, and may negligibly albeit positively impact the structural integrity of the boat.
The second thing the boat hull has to do is go fast. This component is dependent on the electrical and motor teams' abilities to collaborate effectively to deliver an optimal motor for our boat. It is also, however, dependent on the hull team's ability to deliver a hydrodynamic hull.
The hull team has chosen a catamaran design for our boat. This essentially implies that the hull will have two "pontoons" which are structurally integral to the central, primary cabin (interior, below-deck room of a ship) that houses our electronics box. The basic layout for the boat is below:
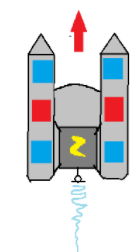
The two "pontoons" of the boat are on either side of the electrical box, annotated by the yellow lightning bolt. They are spaced as such to prevent the boat from rolling over. The pontoons will also house the 4 batteries (blue boxes) and the payloads (red boxes).
The third thing a hull has to do is fit everything nicely. Our hull will accomplish this by default; we will dimension it around the necessary components, which are listed below:
| Component | Full dimensions | Scaled dimensions | Weight |
| Battery (x4) | 12 x 9 x 7 inches | 3 x 2.25 x 1.75 in | undefined |
| Payload (x2) | undefined |
undefined |
30 lbs |
| Electrical box (x1) | 12 x 16 x 8 inches | 3 x 4 x 2 in |
undefined |
scale: 1/4
The fourth thing the hull has to do is prevent us from going into debt. The way we accomplish this is by using affordable materials, planning our production of the hull, and through testing scale models to avoid wasting excessive material. The production procedure, as it currently stands, is below:
| Step |
Procedure |
Purpose |
Status |
| 1 | decide on a hull type |
to decide on the best course of action for the mission. |
complete |
| 2 | prototype the first rudimentary iteration of the hull | to allow the team members to make decisions on the hull while they are able to comprehend it as a 3d concept | complete |
| 3 | prototype the next iterations of the hull in CAD | to allow each member to implement their own ideas on hull design; to allow each member to gain 3D CAD experience; to begin the process of figuring out the best general shape for the scale design | in progress |
| 4 | Decide on the best CAD scale prototype for testing purposes | to decide which CAD model is the most optimal; to give each member the chance to have their ideas heard and weighed | -- |
| 5 | Print the scale model / panel test | to test the effectiveness of 3D-printed hulls; to test the printers and optimize their settings for printing panels out of PETG later on; to provide data for optimizing the thickness and infill of the panels which will be printed later on | -- |
| 6 | Design the skeleton of the real boat in CAD |
the skeleton is necessary for the structural integrity of the boat, and for anchoring the panels along bulkheads. |
-- |
| 7 | Design the real hull in CAD | this step is necessary for simulations (OPTIONAL); the general shape of the hull will be required before we can break it up into individual panels. | -- |
| 8 | Break up the CAD design into panels | Each panel gets printed individually. We also need to figure out how they will be attached to the skeleton. | -- |
| 9 | Print the panels and 3D geometry | This is necessary for assembly of the final boat. | -- |
| 10 | Assembly | The final boat needs to be assembled. | -- |
| 11 | Finishing | The assembly needs to be finished (plastic welds around electrical box, apply coatings, etc...) | -- |
| 12 | Dry testing |
The Dry test is necessary for making sure the electronics won't explode. During dry testing, a single panel should be submerged in water for a few hours to determine the effectiveness of the finishing process on waterproofing the hull panels. |
-- |
| 13 | Wet testing | The Wet test is necessary for determining the performance of the boat in actual water. Leaks should be addressed in this phase, and they should be thoroughly patched. This phase is also necessary for determining if the hydrofoils are go/no-go, and if they need to be adjusted. | -- |
| 14 | Competition | :D | -- |
-------------------------------------------------
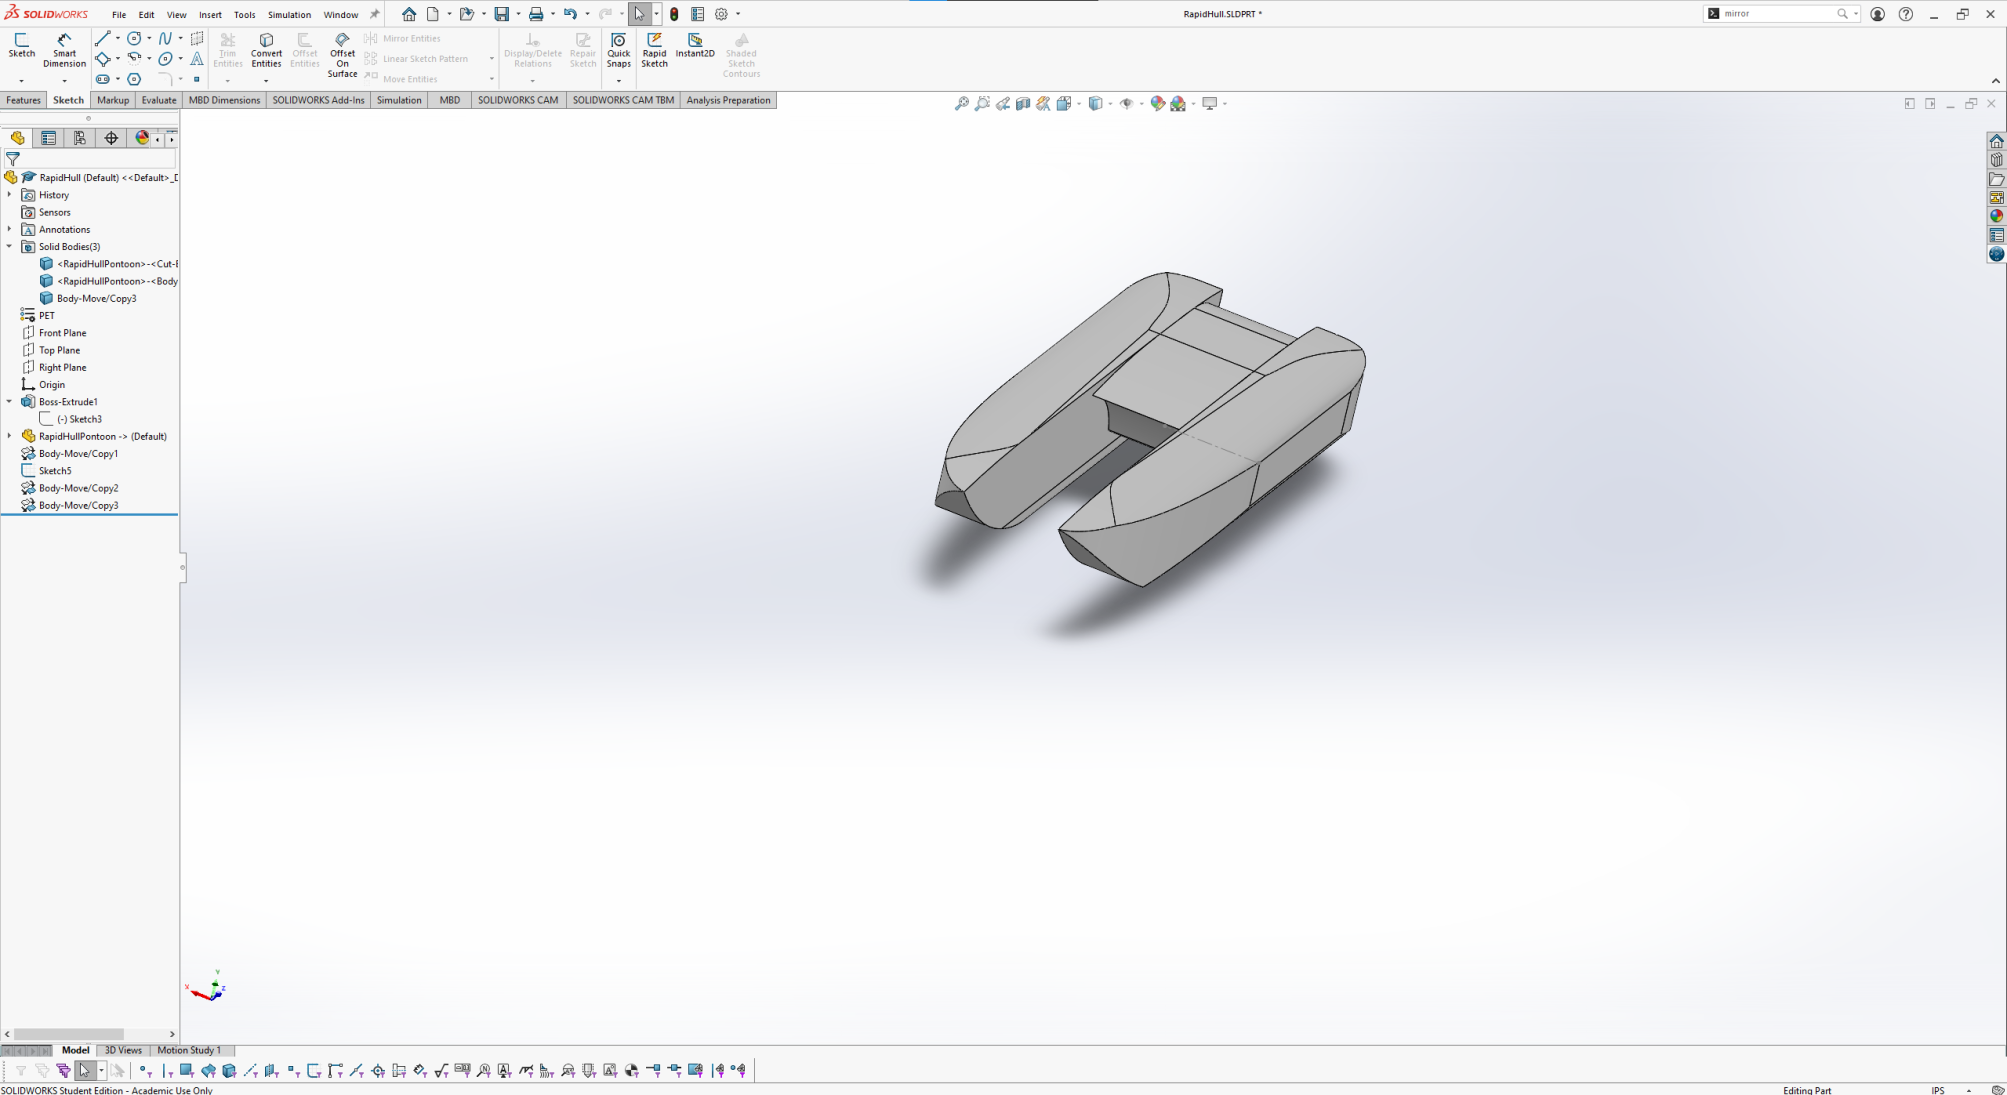
Current hull iterations:
| Author | Iteration |
Image | Description |
| Cai, Dylan, et. al | 0 |
(cardboard model) |
|
| Cai | 1 |
|
|
| Li | 1 |
|
|
| Dylan | 0 |
|
|
| Brooke | 0 |
|
|
| Anyone Else | |||
----------------------------------------------------------------------------------------------------------------------------------------------------
Materials used for final hull:
| Material |
Quantity |
Purpose |
Cost $$ |
| PETG Plastic filament | undefined | All models will be made of PETG. The final boat will use PETG panels for its skin. | undefined |
| Waterproof Material | --> Edits required | ||
| Translucent Resin (brand? type?) | undefined |
Final layer of boat will be translucent resin. It will act as a sealant. | undefined |
| Hydrofoils (type, brand, material, etc...) | --> Edits required | ||
| -- | |||
| -- |