
Wi-Fi Range extender
To-Do
- Setup mesh network
- Test mesh network performance
Topology
Single node
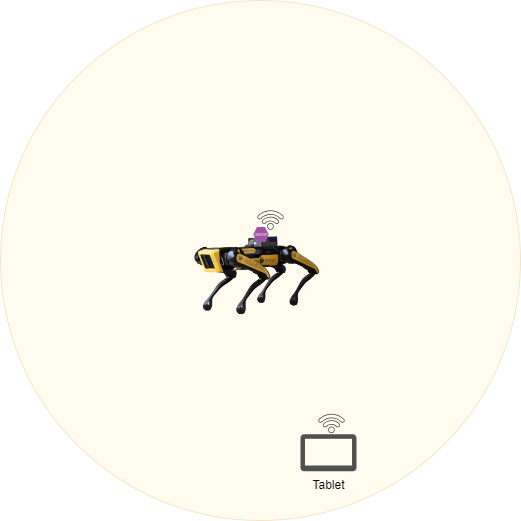
In the single node topology you can see we have one Wireless Access Point (WAP) that is mounted to Spot. This outdoor AP has a much greater range than Spots regular Wi-Fi allowing for the user to control him at much longer distances.
Multinode (mesh)
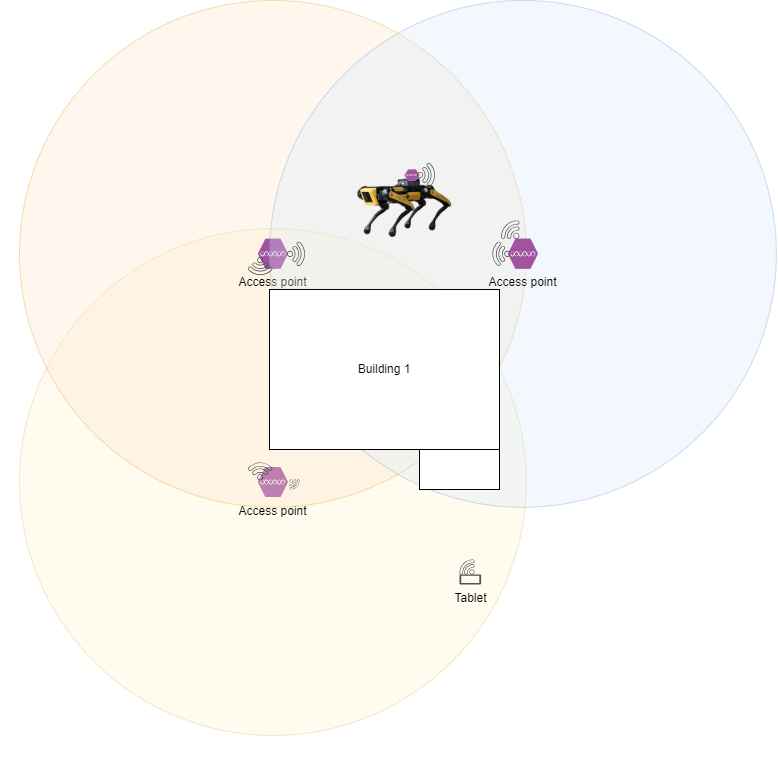
In a multinode topology we have multiple WAP's that connect together wirelessly to form a mesh network that cover a much larger area. In the case above we could cover the entire outside of the building without ever losing connection. This setup does include the WAP that is attached to Spot from the signal node topology because Spot will still benefit from the extra range.
Setup
Spot
To configure a Spot to support either of the two setups above there is not much you need to do, however, here are a few suggested actions:
Stop spot from broadcasting his onboard network.
One way you can stop Spot from broadcasting is to change his Wi-Fi settings in the admin web portal at one of these addressees:
- https://10.0.0.3 (This is the Spot network for the rear RJ45 port)
- https://192.168.80.3 (This is Spot built in access point network)
- https://192.168.50.3 (This is the payload network address for spot. You will only use this one if you are connected to a network port on a Spot payload)
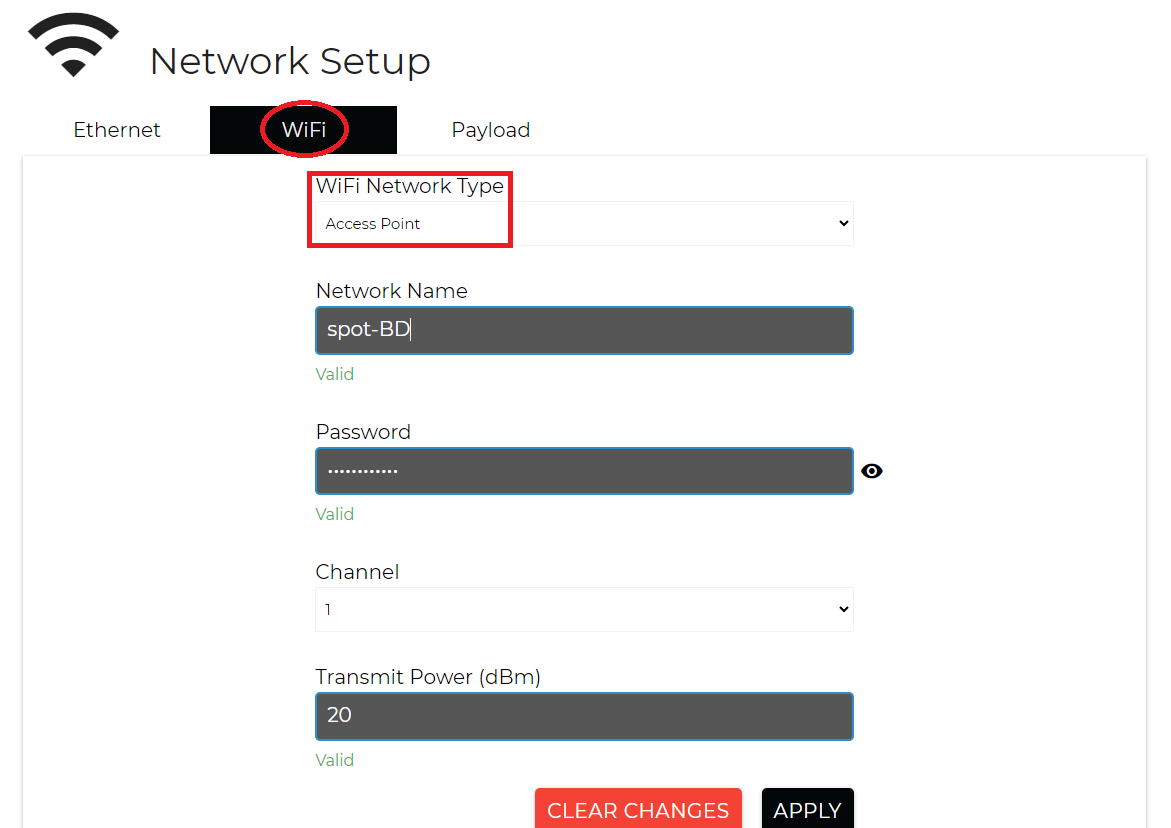
Once you have opened up the admin portal and logged in you should then navigate to the Network Setup page and then WI-FI. You will want to change the Wi-Fi Network Type to Client mode.
CORE I/O
To prepare the CORE I/O for either of the two setups above you need physical access