
Wi-Fi Range extender
To-Do
- Setup mesh network
- Test mesh network performance
Parts list
- Boston Dynamics Spot (If your following this guide I would certainly hope you have one or plan to get one)
- CORE I/O
- Wireless Access Point (WAP) (if your WAP has a 12v input you can use a barrel jack otherwise most use Power Over Ethernet (POE))
- Ethernet cable (you will need 2 cables if using a POE injector)
- POE injector
- Male Barrel jack.
Topology
Single node
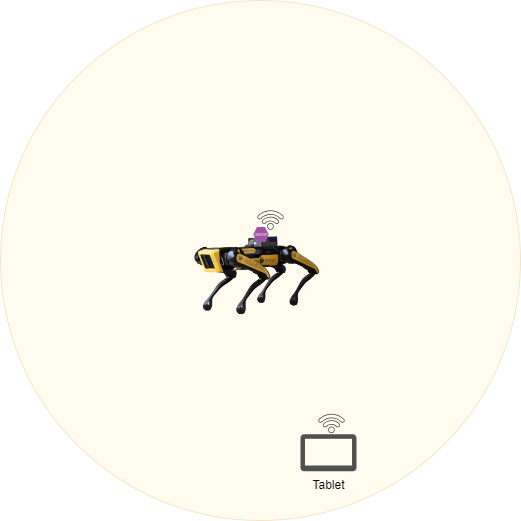
In the single node topology you can see we have one WAP that is mounted to Spot. This outdoor AP has a much greater range than Spots regular Wi-Fi allowing for the user to control him at much longer distances.
Multinode (mesh)
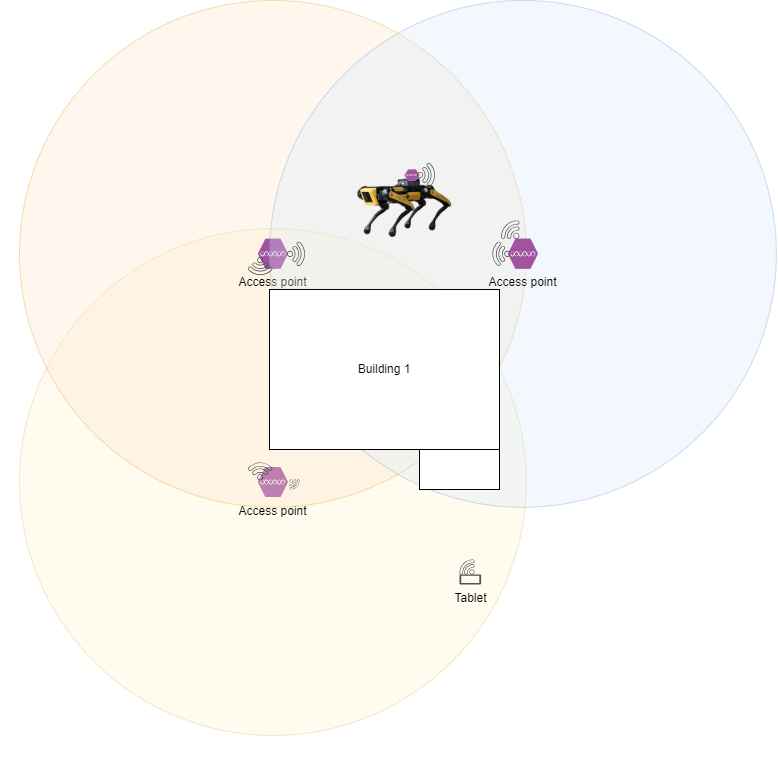
In a multinode topology we have multiple WAP's that connect together wirelessly to form a mesh network that cover a much larger area. In the case above we could cover the entire outside of the building without ever losing connection. This setup does include the WAP that is attached to Spot from the signal node topology because Spot will still benefit from the extra range.
Setup
Spot
To configure a Spot to support either of the two setups above there is not much you need to do, however, here are a few suggested actions:
Stop spot from broadcasting his onboard network.
One way you can stop Spot from broadcasting is to change his Wi-Fi settings in the admin web portal at one of these addressees:
- https://10.0.0.3 (This is the Spot network for the rear RJ45 port)
- https://192.168.80.3 (This is Spot built in access point network)
- https://192.168.50.3 (This is the payload network address for spot. You will only use this one if you are connected to a network port on a Spot payload)
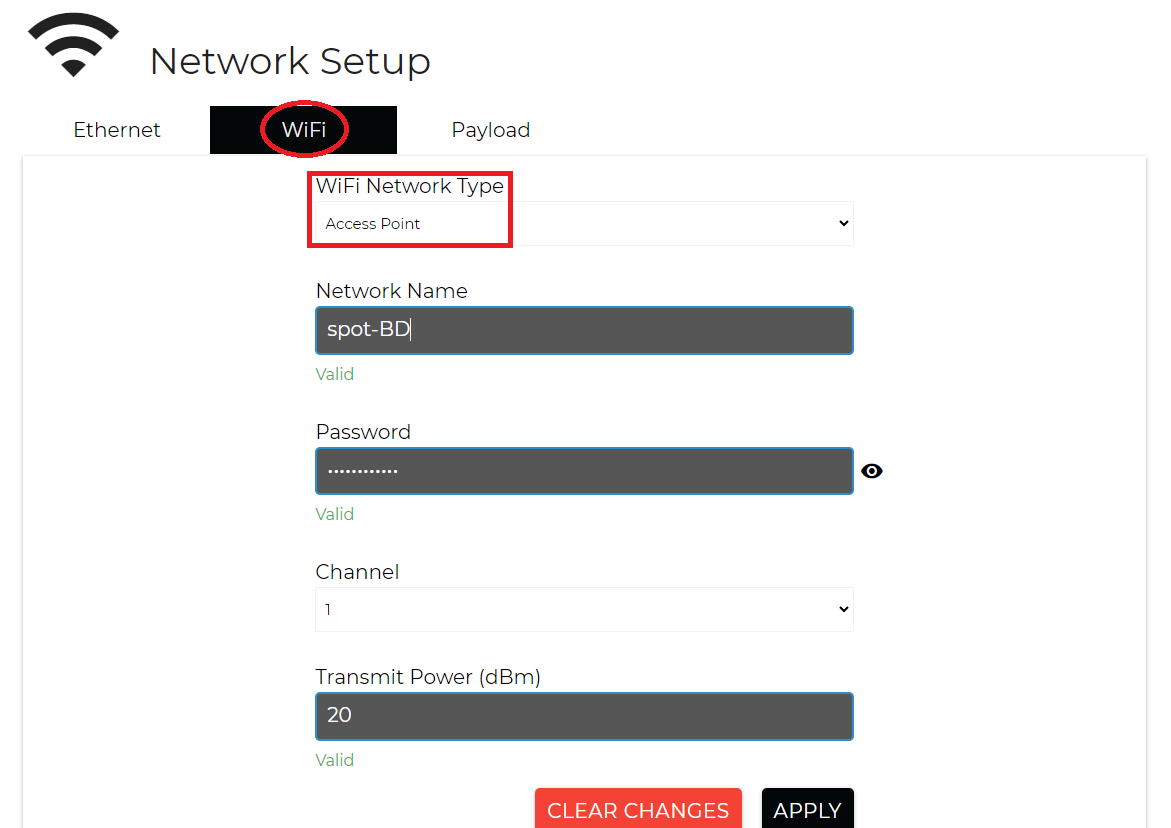
Once you have opened up the admin portal and logged in you should then navigate to the Network Setup page and then WI-FI. You will want to change the Wi-Fi Network Type to Client mode.
Password is provided but somebody else
CORE I/O
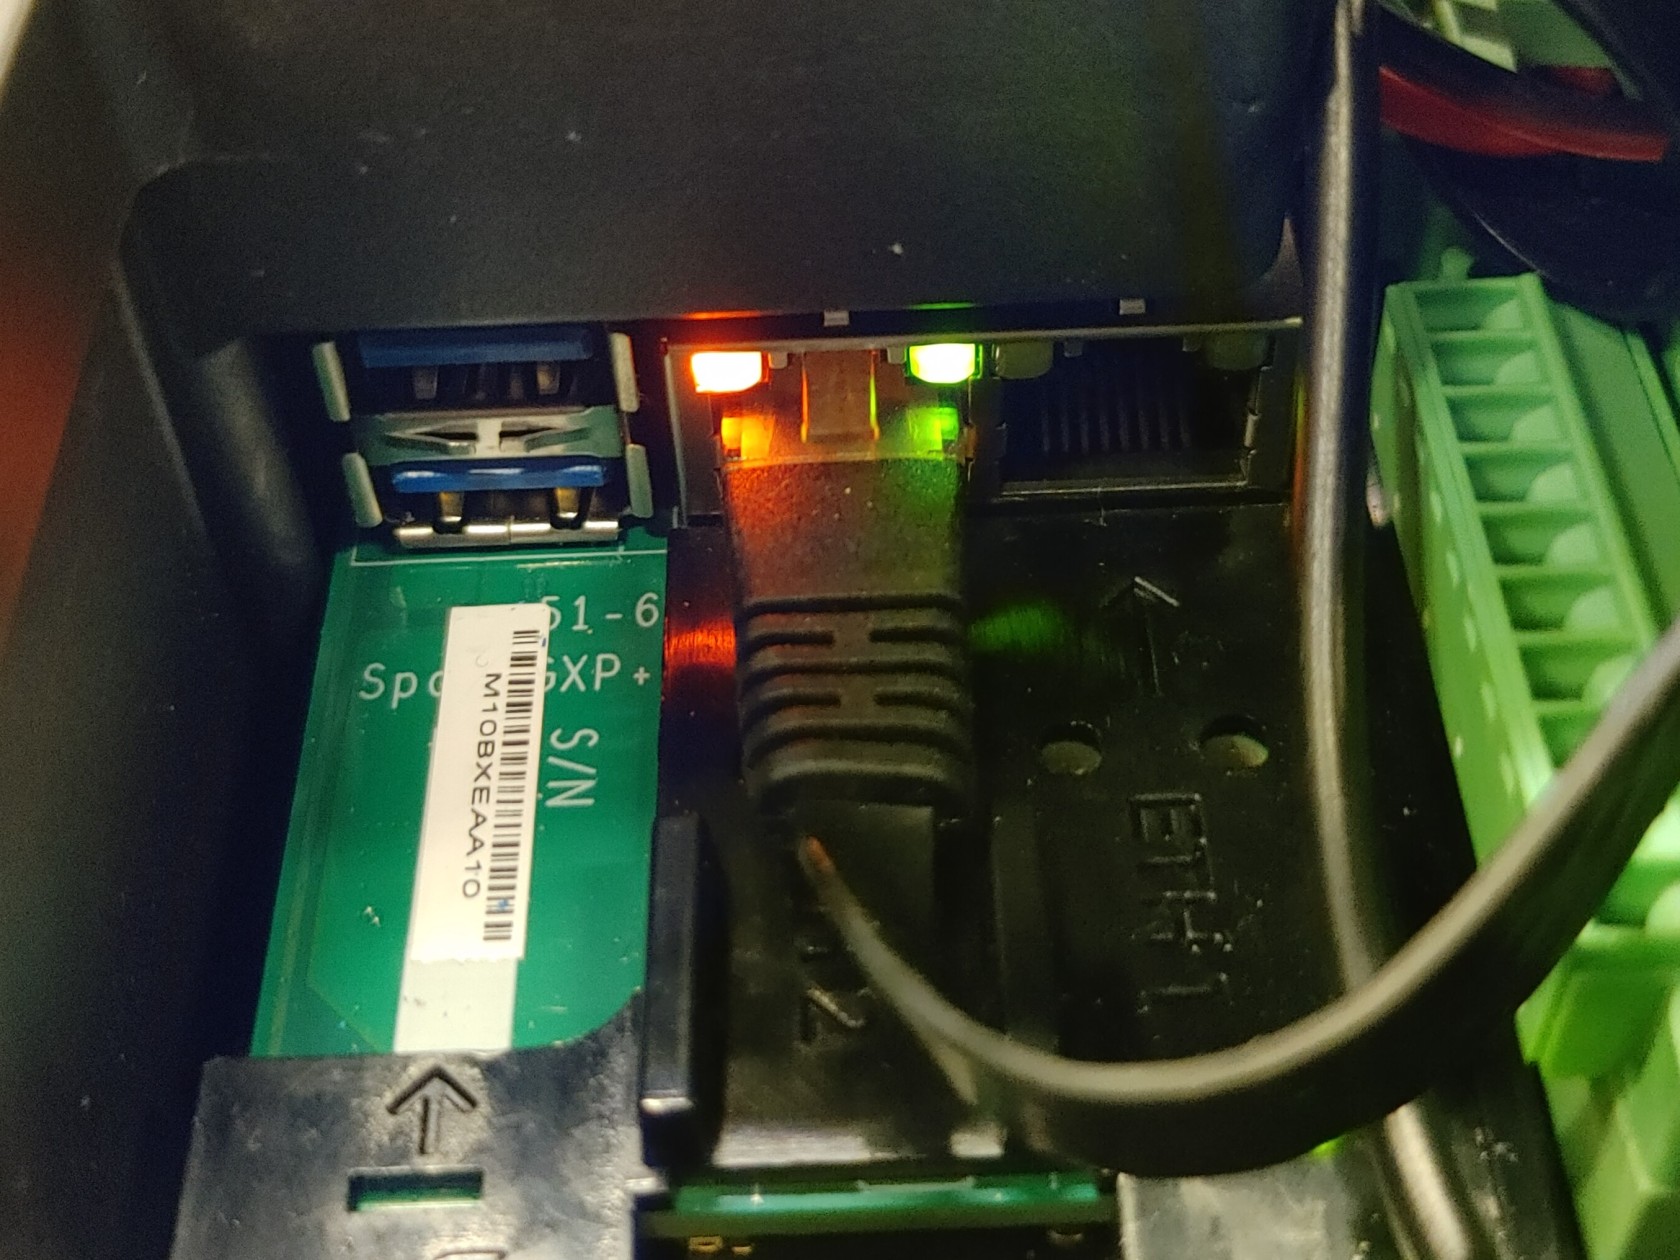
- To prepare the CORE I/O for either of the two setups above you need physical access to the CORE I/O. You also need to have the CORE I/O mounted to Spot. You need to remove the wire cover plate to gain access to the RJ45 jacks inside. You can use either of the two ports inside.
- The second thing you need to setup is power for the WAP. You have two options:

Male Barrel Jack
If your WAP has a DC power input this would be the simplest method to power it from the CORE I/O.
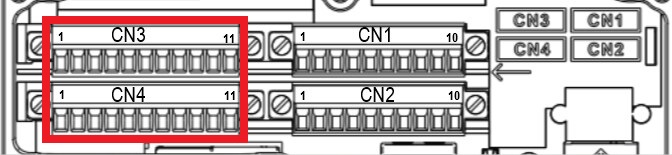
You then need to locate the CN3 and CN4 terminal blocks under the CORE I/O cover. You will use one of these to connect the WAP to the regulated power that the CORE I/O provides.
When you connect anything to the CORE I/O power outputs make sure you read the documentation!!
You will need to find the correct power outputs based on your WAP requirements. Here is a table of the connectors and their pinouts: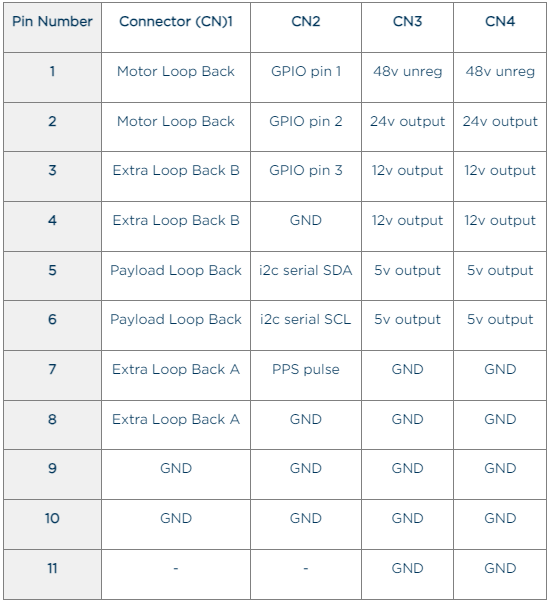
Using a POE injector
To use a POE based WAP you need determine the type of POE your your device takes. You can either have Passive or Active POE.
Passive POE
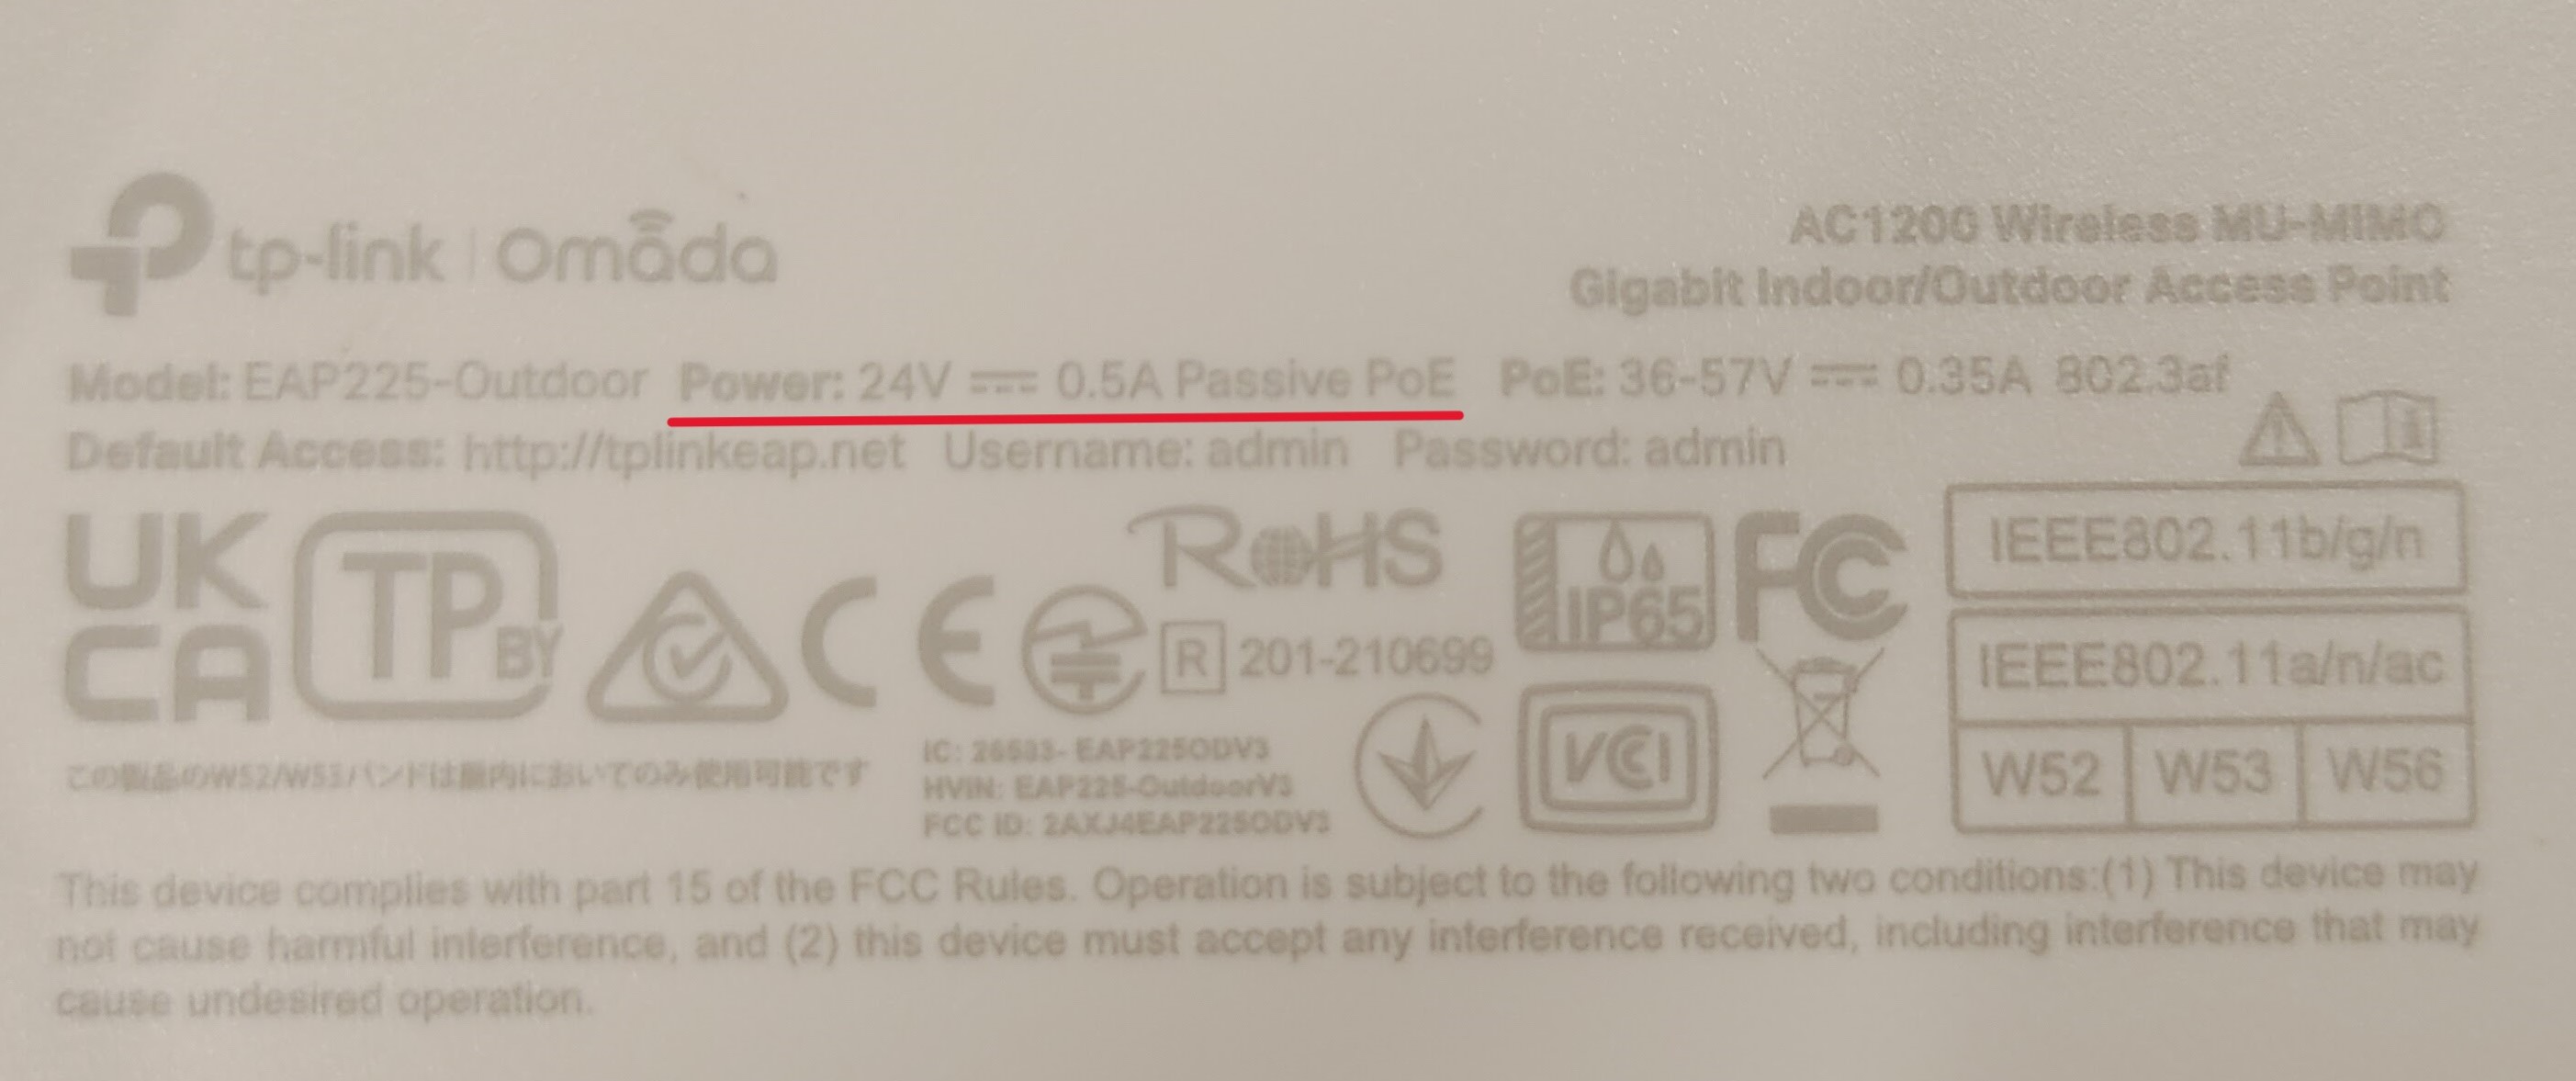
Passive POE works by inputting a specific voltage across 1 or 2 pairs of the 4 pairs of wire that make up a CATX wire. Below you can see the specification of the WAP we choose, which is 24v.
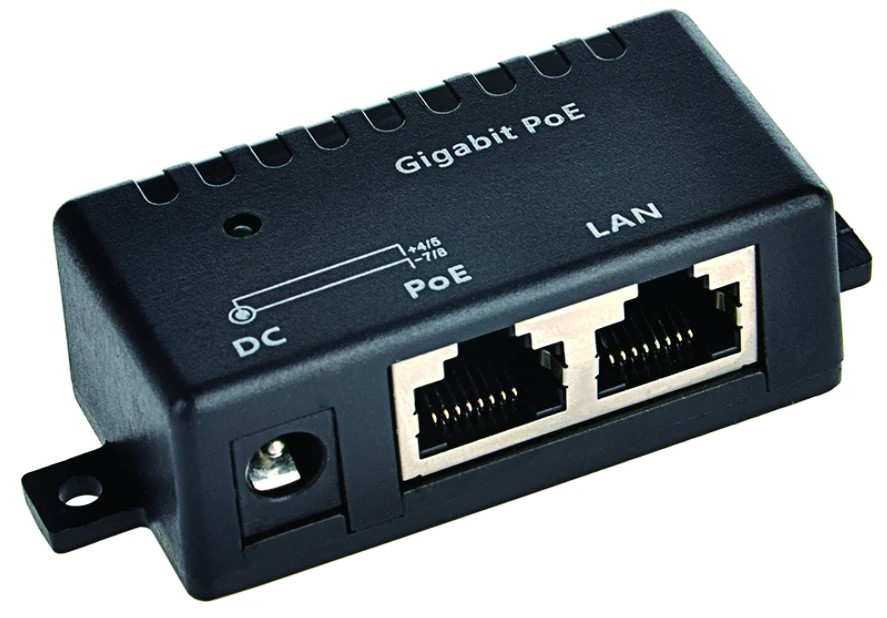
After you determine what your requirements you need to find a passive POE injector such as this one that takes a male barrel jack input.
You will to then need to provide power from the CORE I/O to the male barrel jack.
You then need to locate the CN3 and CN4 terminal blocks under the CORE I/O cover. You will use one of these to connect the POE injector to the regulated power that the CORE I/O provides.
When you connect anything to the CORE I/O power outputs make sure you read the documentation!!
You will need to find the correct power outputs based on your WAP requirements. Here is a table of the connectors and their pinouts:
Active POE
Active POE works by negotiating with client device, in our case the WAP, to determine what voltage and power the client needs.